I gathered up my supplies. The above picture just shows what is needed for the board without a cutting mat on the back. If you decide to do that part, you will need a mat and spray adhesive. Pictured above are the piece of plywood - mine is about 14"x14", some batting, material to cover it, scissors, construction stapler, and staples - make sure they are not longer than your plywood is deep.
Lay the board on your batting. My batting was about 4 pieces of a sample stack of batting types I picked up from the Hobbs booth in Paducah one year. I used only the all cotton pieces.
Trim around the board, leaving about a quarter inch of batting all the way around.
I was going to use plain muslin, but decided I didn't have to! I picked out a print that I have always liked, that I had in my stash. I liked this one so much, I had bought a bolt of it from Miller's in Arthur.
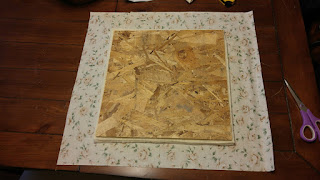
Cut your piece of fabric about 3 or 4 inches larger all around the square. Layer as follows: material (right side on table), batting, then board.
Bring up one edge and staple to secure. I used five staples on one side.
Bring material around on opposite side, pulling snug, and staple as you did the other side.
Bring material around on sides and staple. I folded the corners in a bit and stapled down the excess.
This picture does not show it, but I did trim the excess bit sticking out. You don't really have to.
Ta-Da!
Now, if you have an old cutting mat that has seen better days, you can make one side a cutting board.
Fortunately, where this mat was cut through it still left enough for me to cover the back of the board.
I glued it down using spray adhesive. All done!
I may make a second one just because.


No comments:
Post a Comment